Create a UILabel
suggest changeWith a Frame
When you know the exact dimensions you want to set for your label, you can initialize a UILabel with a CGRect frame.
Swift
let frame = CGRect(x: 0, y: 0, width: 200, height: 21)
let label = UILabel(frame: frame)
view.addSubview(label)
Objective-C
CGRect frame = CGRectMake(0, 0, 200, 21);
UILabel *label = [[UILabel alloc] initWithFrame:frame];
[view addSubview:label];
With Auto Layout
You can add constraints on a UILabel when you want iOS to dynamically calculate its frame at runtime.
Swift
let label = UILabel()
label.backgroundColor = .red
label.translatesAutoresizingMaskIntoConstraints = false
view.addSubview(label)

NSLayoutConstraint.activate([
//stick the top of the label to the top of its superview: label.topAnchor.constraint(equalTo: view.topAnchor)
//stick the left of the label to the left of its superview //if the alphabet is left-to-right, or to the right of its //superview if the alphabet is right-to-left: label.leadingAnchor.constraint(equalTo: view.leadingAnchor)
//stick the label’s bottom to the bottom of its superview: label.bottomAnchor.constraint(equalTo: view.bottomAnchor)
//the label’s width should be equal to 100 points: label.widthAnchor.constraint(equalToConstant: 100)
])Objective-C
UILabel *label = [[UILabel alloc] init];With Objective-c + Visual Format Language (VFL)
UILabel *label = [UILabel new]; label.translatesAutoresizingMaskIntoConstraints = NO; [self.view addSubview label]; // add horizontal constraints with 5 left and right padding from the leading and trailing
[self.view addConstraints:[NSLayoutConstraint constraintsWithVisualFormat:@“V:|-5-[labelName]-5-|” options:0 metrics:nil views:@{@“labelName”:label}]]; // vertical constraints that will use the height of the superView with no padding on top and bottom [self.view addConstraints:[NSLayoutConstraint constraintsWithVisualFormat:@“H:|[labelName]|” options:0 metrics:nil views:@{@“labelName”:label}]]
VFL documentation can be found here
After the label has been created, be sure to set the dimensions via Auto Layout. Xcode will display errors if it is done improperly.
With Interface Builder
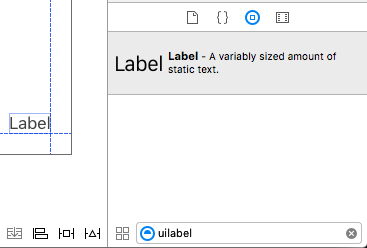
You also use Interface Builder to add a UILabel to your Storyboard or .xib file by dragging a Label from the Object Library panel and dropping it into a view in the canvas:
Instead of specifying a frame (position and size) for a UILabel programmatically, a Storyboard or a .xib lets you use Auto Layout to add constraints to the control.
In order to access this label created from storyboard or xib create an IBOutlet of this label.
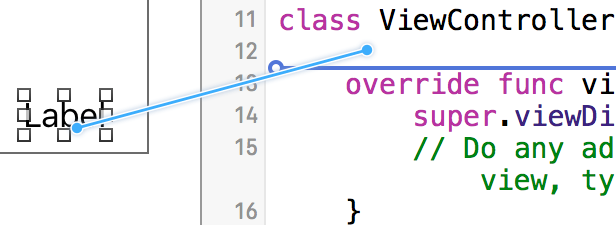
Linking Between Interface Builder and View Controller
Once you have added a UILabel to your Storyboard or .xib the file you can link it to your code by pressing Control ⌃ and then dragging the mouse between the UILabel to your ViewController, or you could drag to the code while right clicking for it to have the same effect.
In the properties dialog, you can set the name of UILabel, and set it as strong or weak. For more information about strong and weak, see this,
The other way is to make the outlet programmatically as follows:
Swift
@IBOutlet weak var nameLabel : UILabel!Objective-C
@property (nonatomic, weak) IBOutlet UILabel *nameLabel;