Creating a default Single View Application
suggest changeTo develop an application for iOS, you should start with an application called Xcode. There are other alternative tools you can use, but Xcode is Apple’s official tool. Note, however, that it only runs on macOS. The latest official version is Xcode 8.3.3 with Xcode 9 (currently in beta) due to be released later this year.
- Boot up your Mac and install Xcode from the App Store if it’s not already installed.
(If you prefer not to use the App Store or have problems, you can also download Xcode from the Apple Developer website, but make sure that you select the latest release version and not a beta version.)

- Open Xcode. The following window will open:
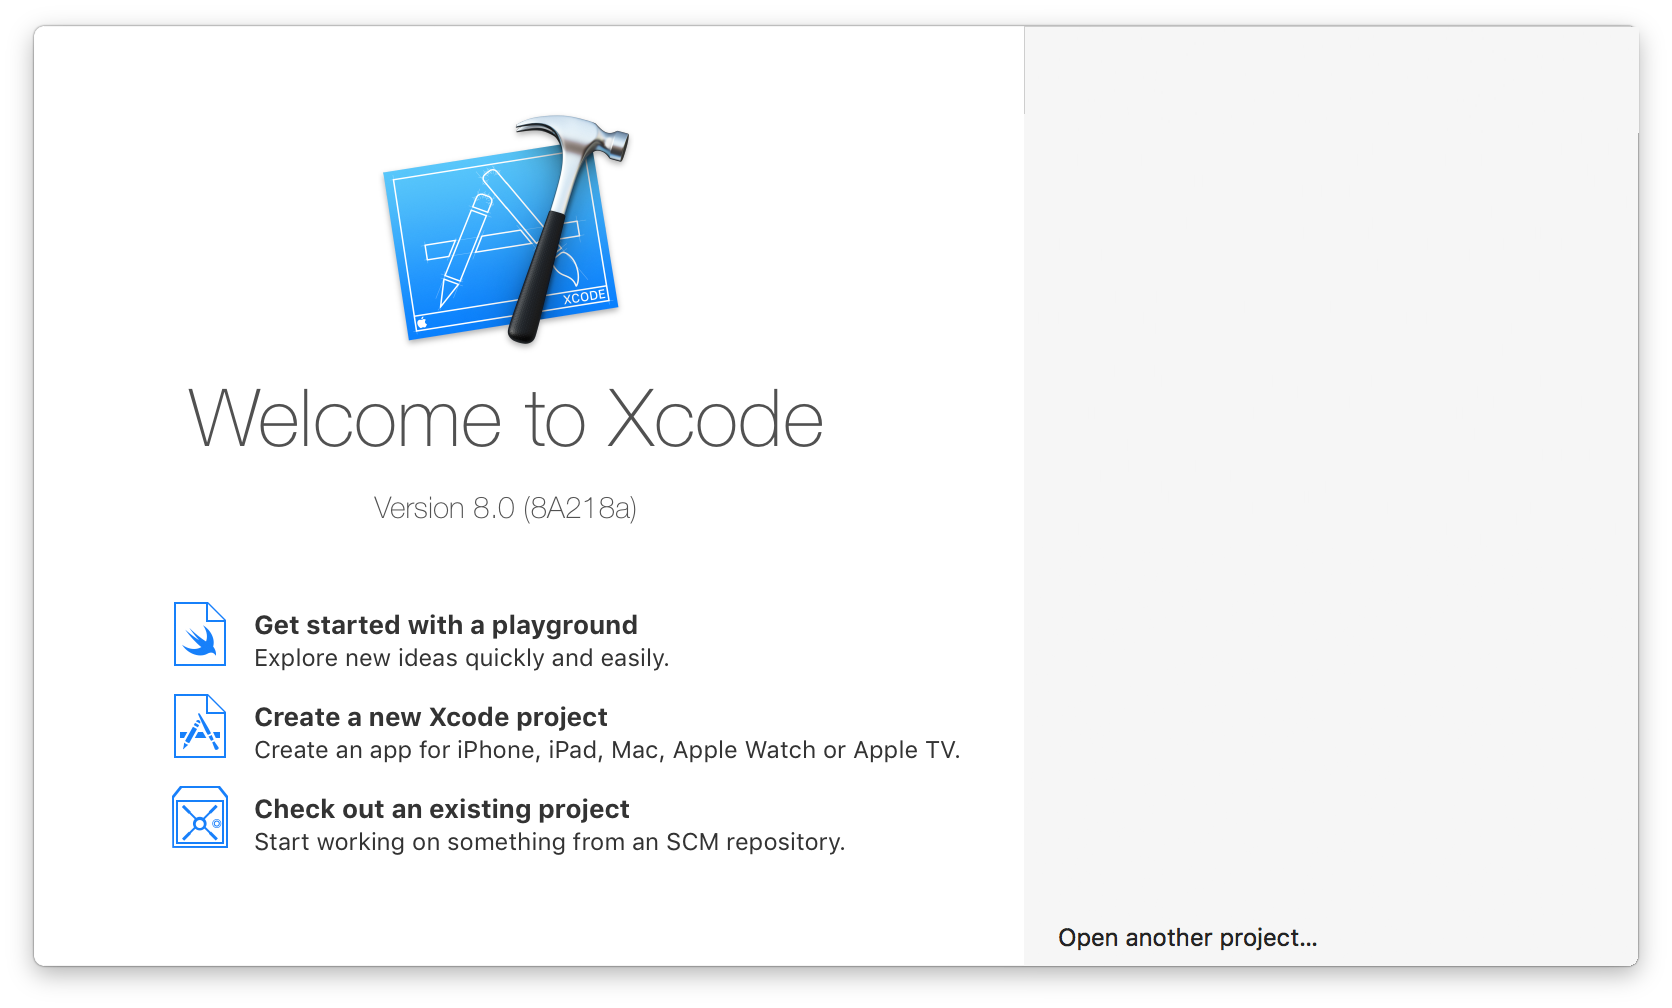
The window presents you with the following options:
- Getting started with a playground: This was introduced with the Swift language and Xcode 6. It’s an interactive area which can be used to write small pieces of code to check runtime changes. It’s a great way for Swift learners to be introduced to new Swift features.
- Create a new Xcode project: Choose this option, which creates a new project with default configuration.
- Check out an existing project: This is used to check out a project from a repository location, for example, check out a project from SVN.
- Select the second option Create a new Xcode project and Xcode will ask you to do some initial project setup:
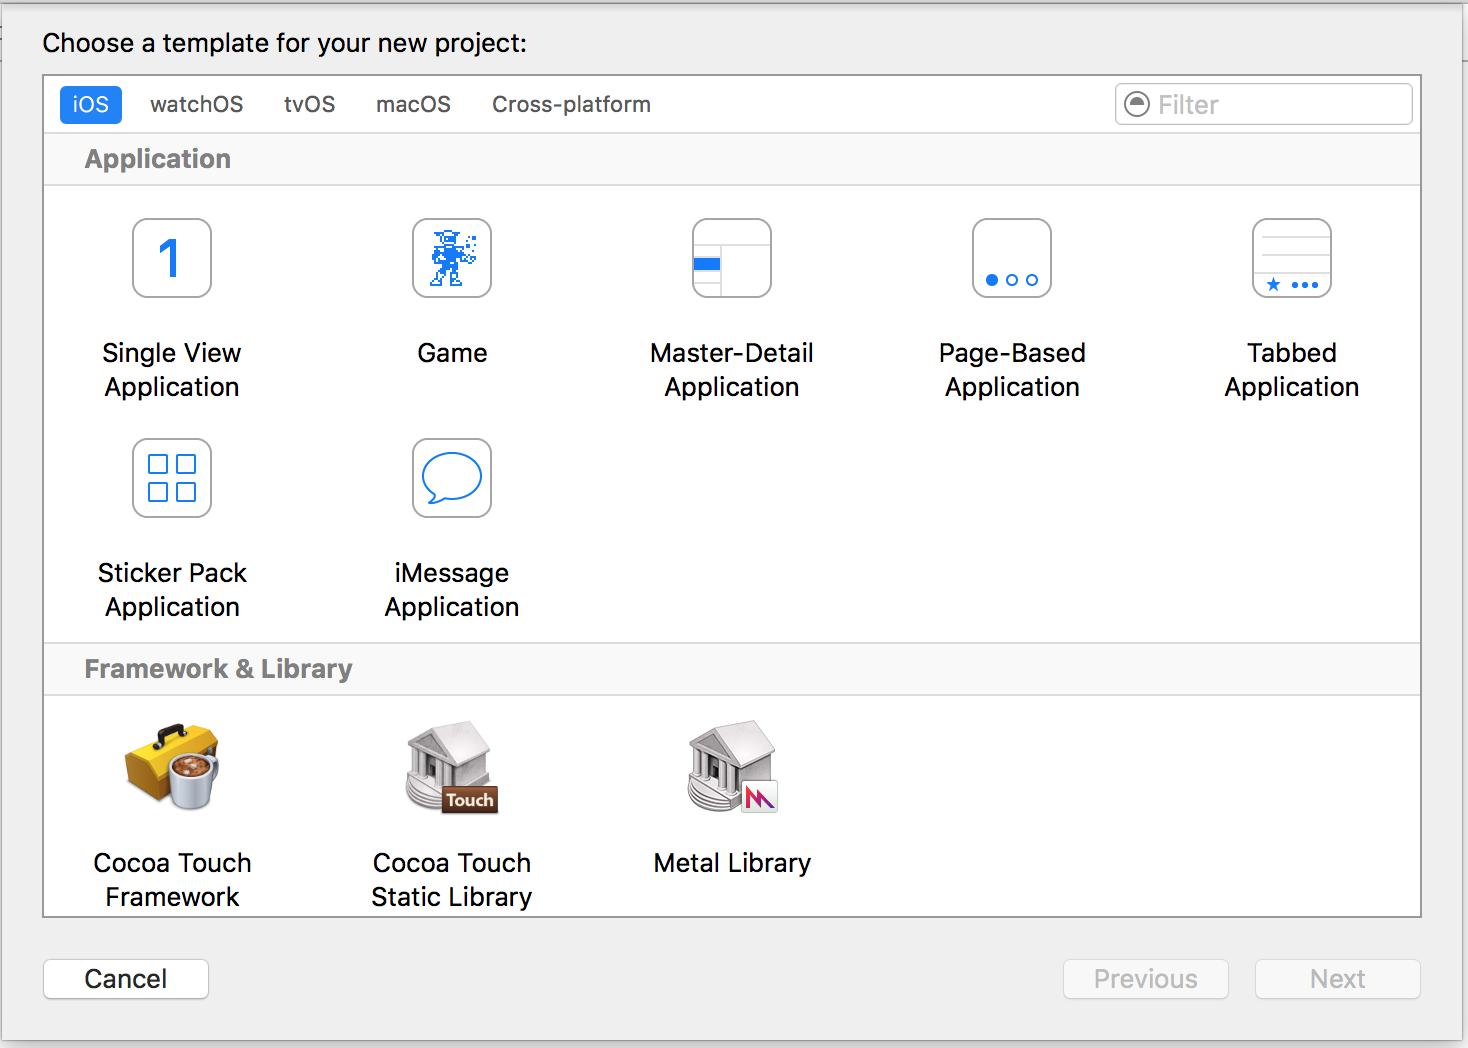
This wizard is used to select your project template. There are 5 options:
- iOS: Used to create iOS apps, libraries and frameworks
- watchOS: Used to create watchOS apps, libraries and frameworks
- tvOS: Used to create tvOS apps, libraries and frameworks
- macOS: Used to create macOS apps, libraries, frameworks, packages, AppleScripts, etc.
- Cross-platform: Used to create cross-platform apps, templates and In-App Purchase Contents
You can see that there are many different templates for your application. These templates are helpful to boost your development; they are pre-built with some basic project setups like UI interfaces and class files.
Here, we’ll use the first option, iOS.
- Master-Detail Application:
This template contains a combined master and detail interface: the master contains objects which are related to the detail interface. Selecting objects in the master will change the details interface. You can see this kind UI in the Settings, Notes and Contacts applications on the iPad.
- Page-Based Application:
This template is used to create the page-based application. Pages are different views held by one container.
- Single View Application:
This is a normal application development template. This is good for beginners to learn application flow.
- Tabbed Application:
This template creates tabs at the bottom part of an application. Each tab has a different UI and a different navigation flow. You can see this template used in apps like Clock, iTunes Store, iBooks and App Store.
- Game:
This is a starting point for game development. You can go further with game technologies like SceneKit, SpriteKit, OpenGL ES and Metal.
- In this example, we will start with Single View Application
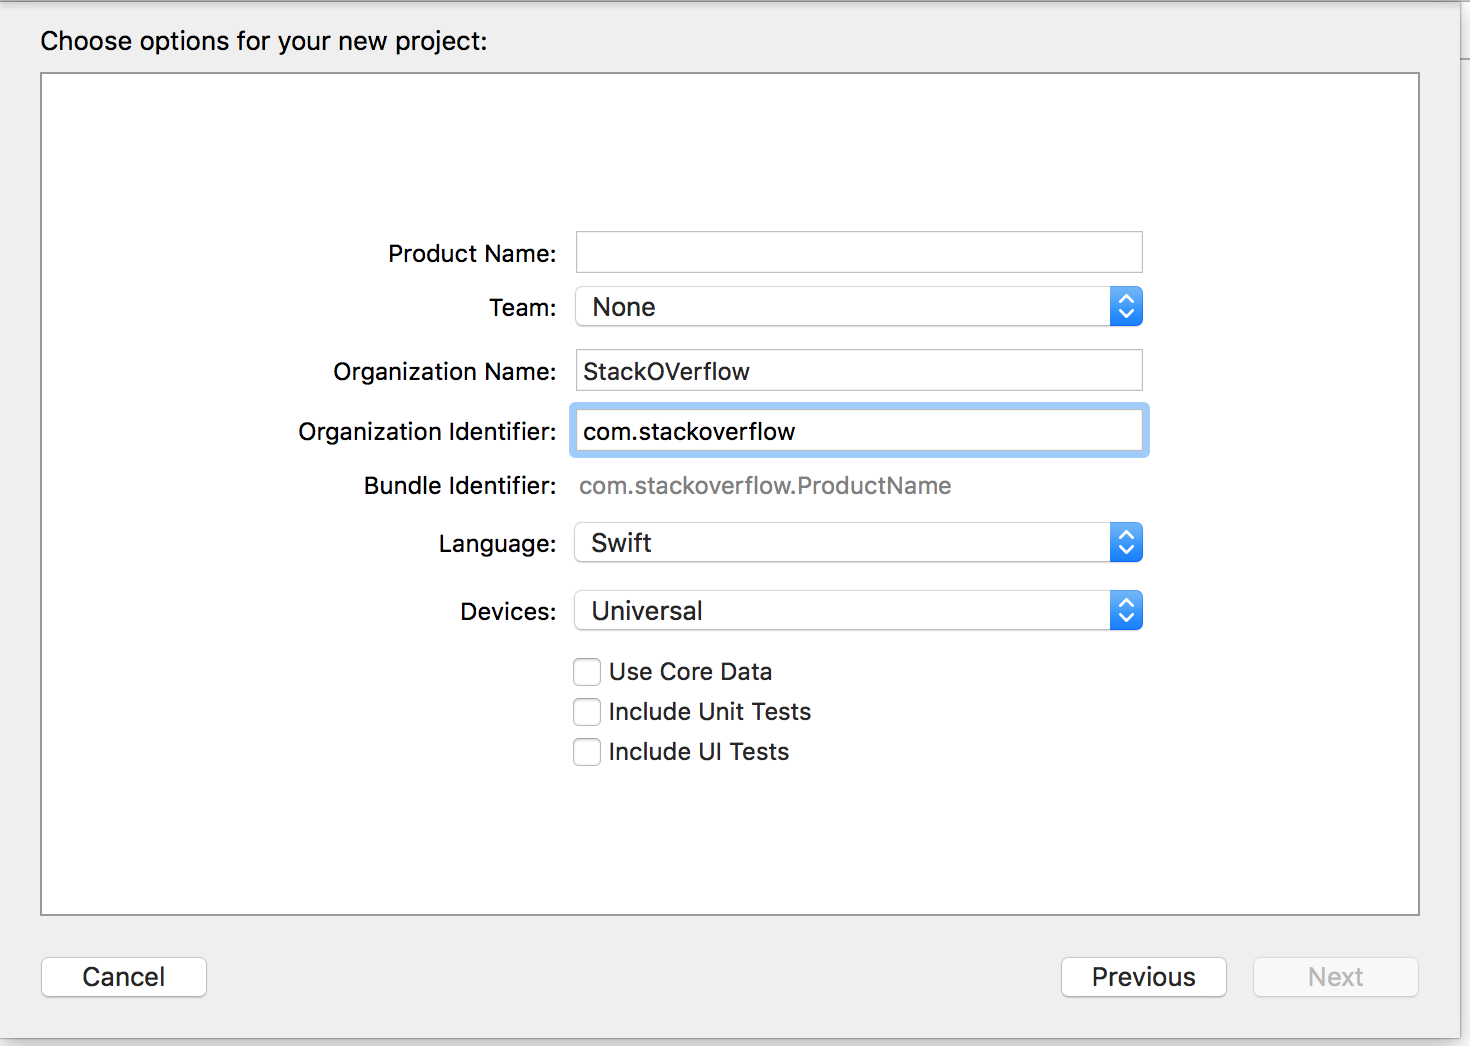
The wizard helps you to define project properties:
- Product Name: The name of the project / application
- Organization Name: The name of the organization in which you are involved
- Organization Identifier: The unique organization identifier which is used in the bundle identifier. It is recommended to follow reverse domain name service notation.
- Bundle Identifier: This field is very important. It is based on your project name and organization identifier, choose wisely. The bundle identifier will be used in the future to install the application on a device and upload the app to iTunes Connect (which is the place we upload apps to be published on the App Store). It’s a unique key to identify your application.
- Language: The programming language which you would like to use. Here you can change Objective-C to Swift if it’s not selected.
- Devices: Supported devices for your application that can be changed later. It shows iPhone, iPad, and Universal. Universal applications support iPhone and iPad devices, and it’s recommended to select this option when it’s not necessary to run the app on only one kind of device.
- Use Core Data: If you would like to use Core Data Model in your project then mark it as selected, and it will create a file for the
.xcdatamodel. You can also add this file later on if you don’t know in advance. - Include Unit Tests: This configures the unit test target and creates classes for unit testing
- Include UI test: This configures the UI test target and creates classes for UI testing
Click on Next and it will ask you for a location where you want to create project directory.
Click on Create and you will see the Xcode UI with an already defined project setup. You can see some classes and Storyboard files.
This is a basic template for a Single View Application.
At the top left of the window, check that a simulator is selected (e.g. “iPhone 6” as shown here) and then press the triangular RUN button.

- A new application will open—Simulator (this may take some time the first time you run it and you may need to try twice if you see an error the first time). This application provides us with device simulation for created applications. It almost looks like a real device! It contains some applications like a real device. You can simulate orientations, location, shake gesture, memory warnings, In-Call Status bar, finger touch, lock, reboot, home etc.
You will see a plain white application because we have not made any changes to the template yet.
So start your own. it’s a long run and there are lots of new opportunities waiting for you!
If you are not sure where to go next, try out Apple’s ‘Jump Right In’ tutorial. You have already performed the first few steps so are off to a head start.