Creating a simple UNNotificationContentExtension
suggest changeStep 1
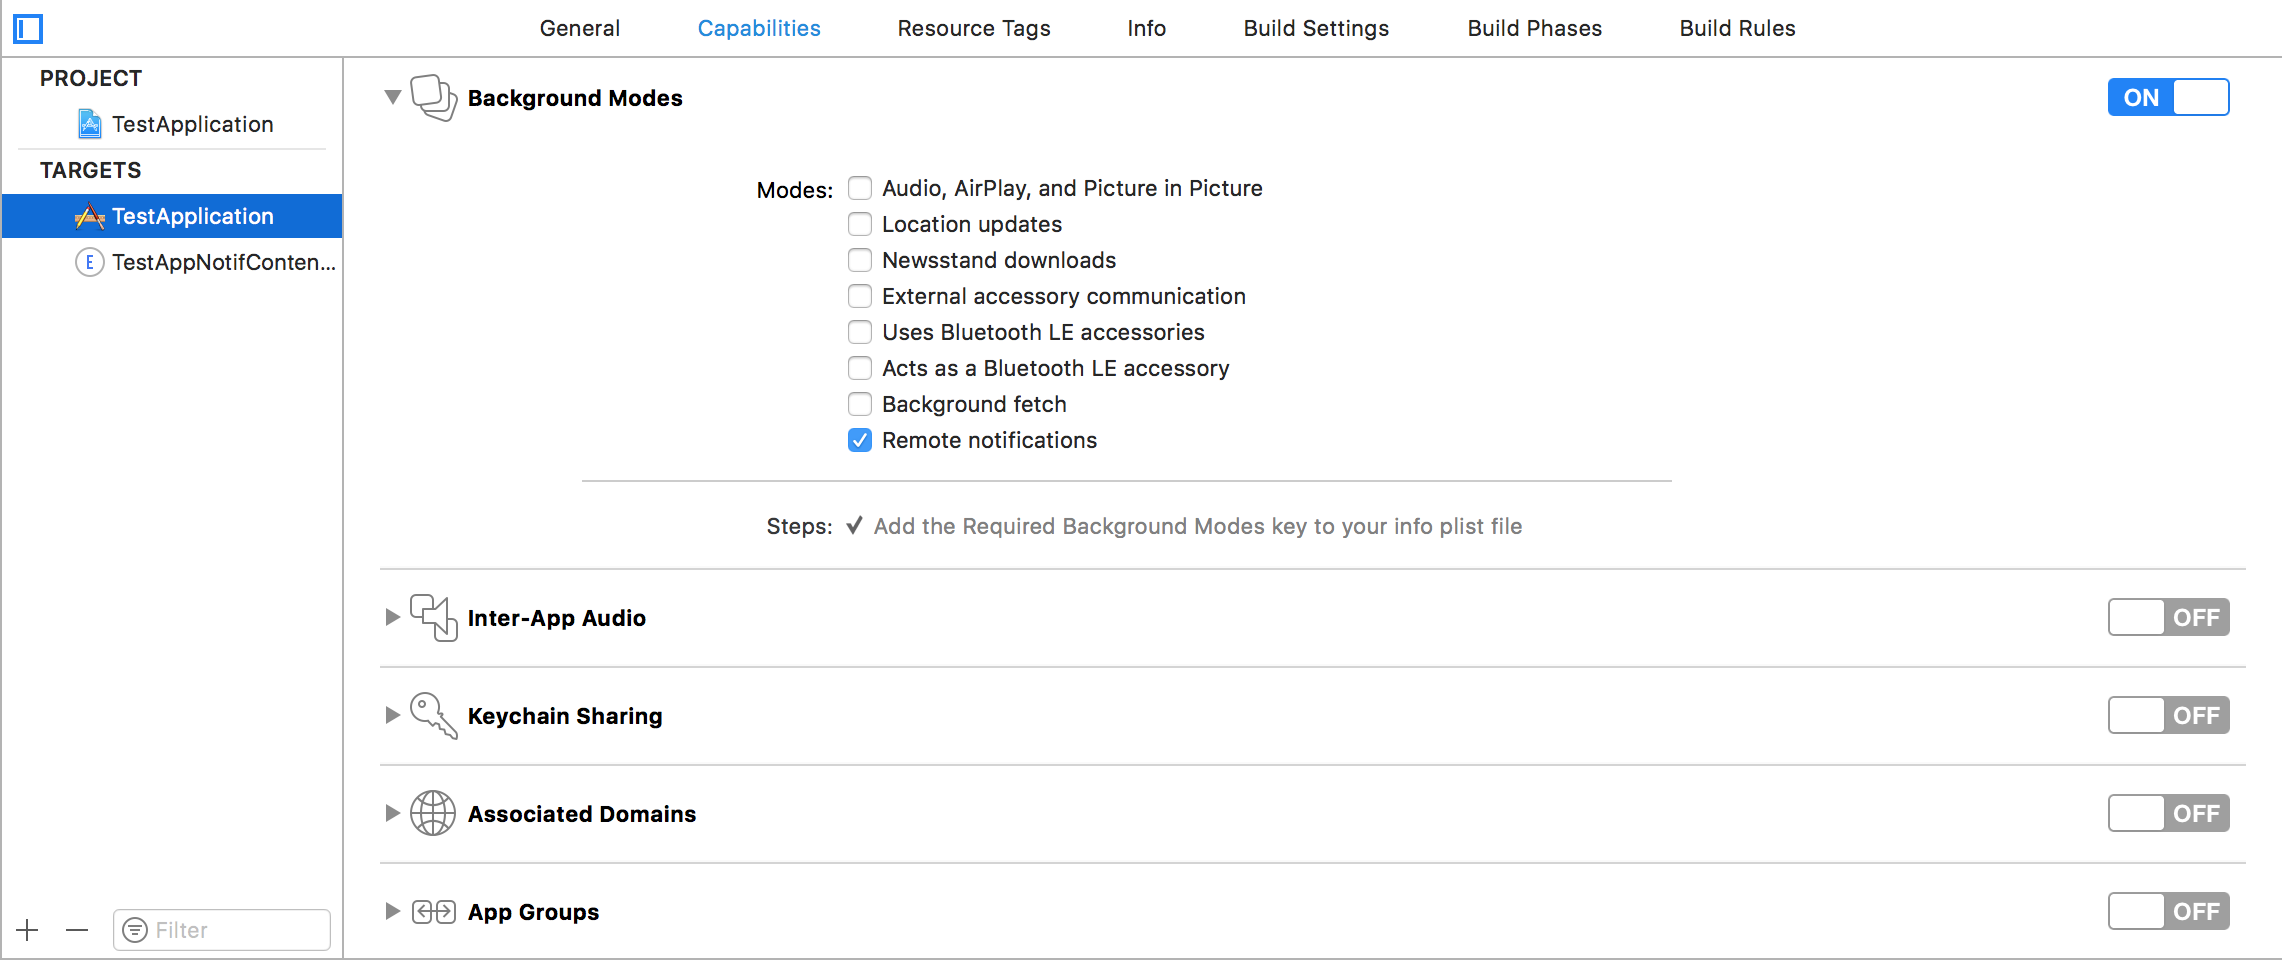
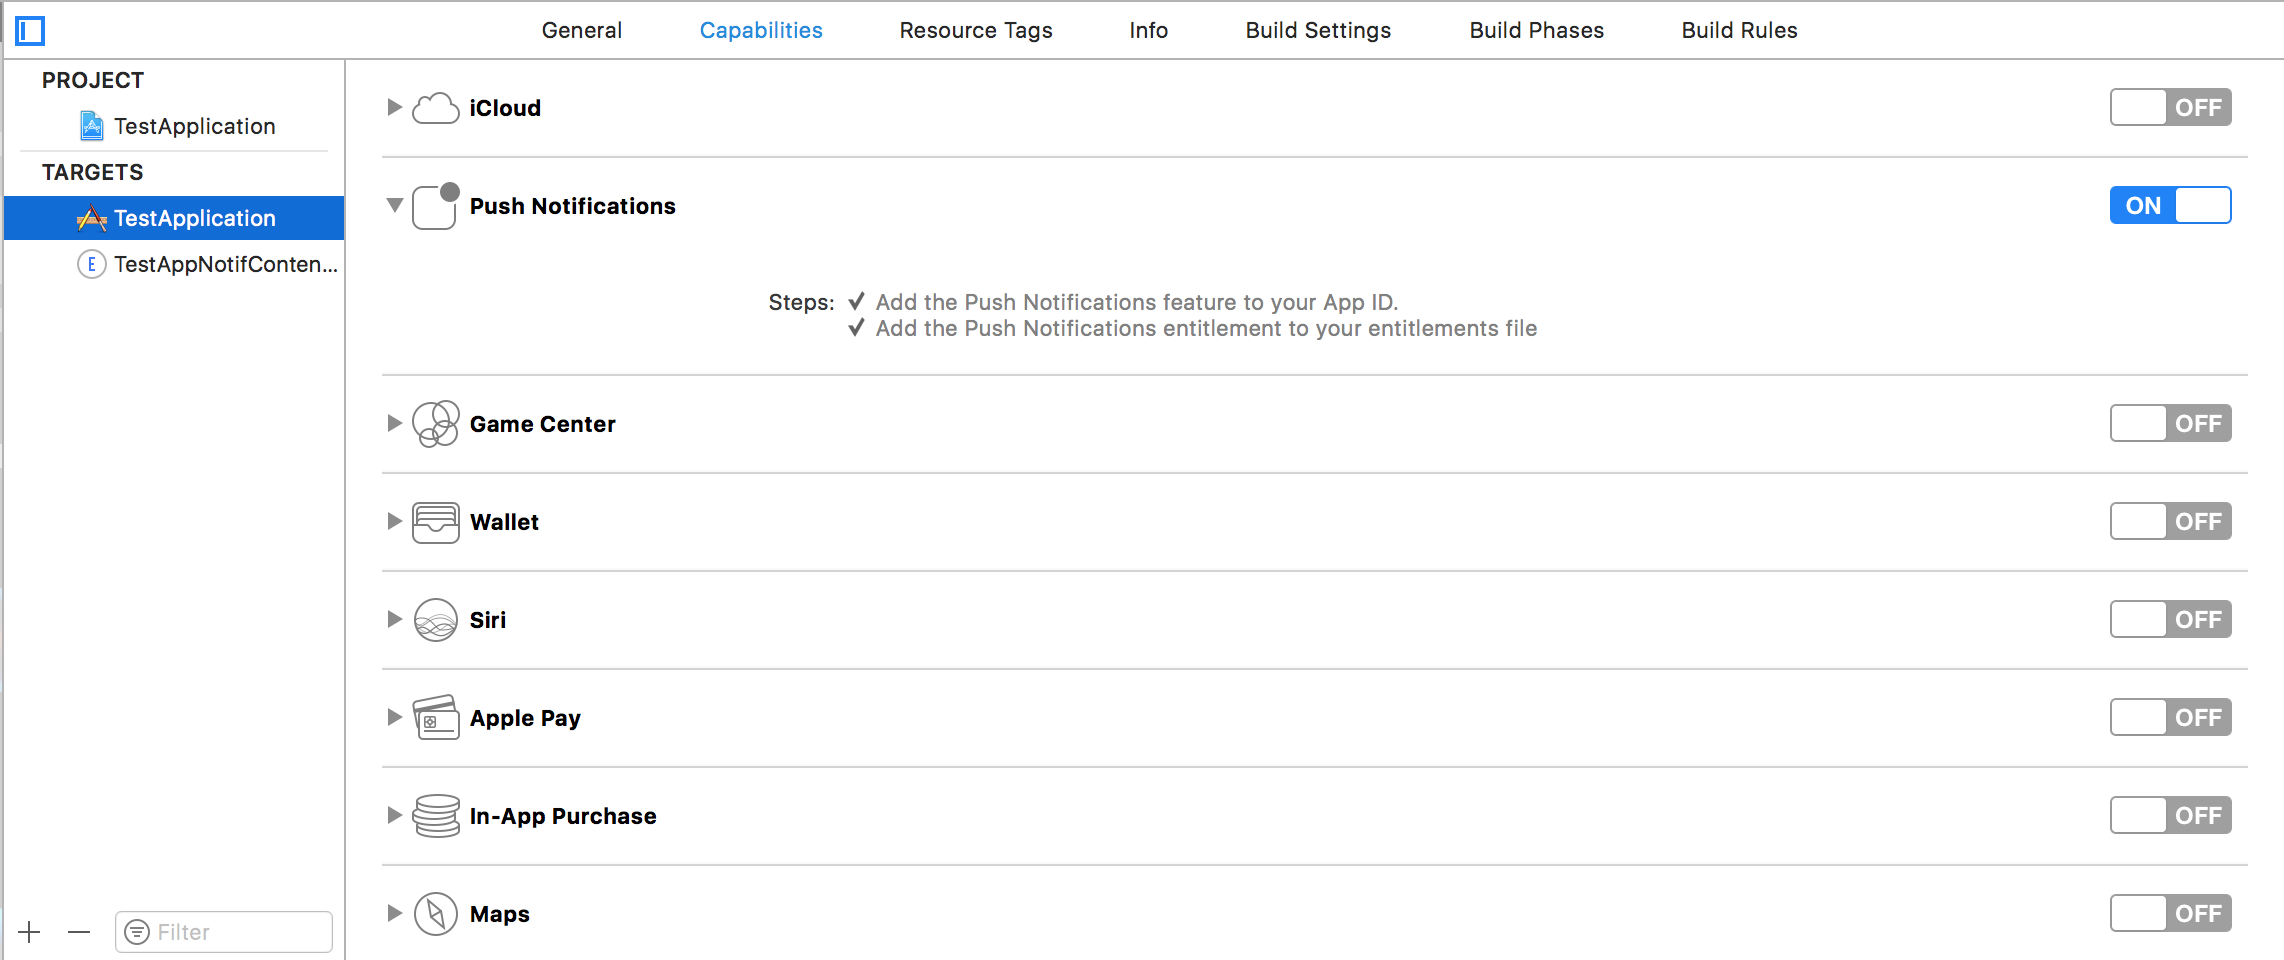
Making the environment suitable for Notification. Make sure you enabled Background Modes and Push Notification
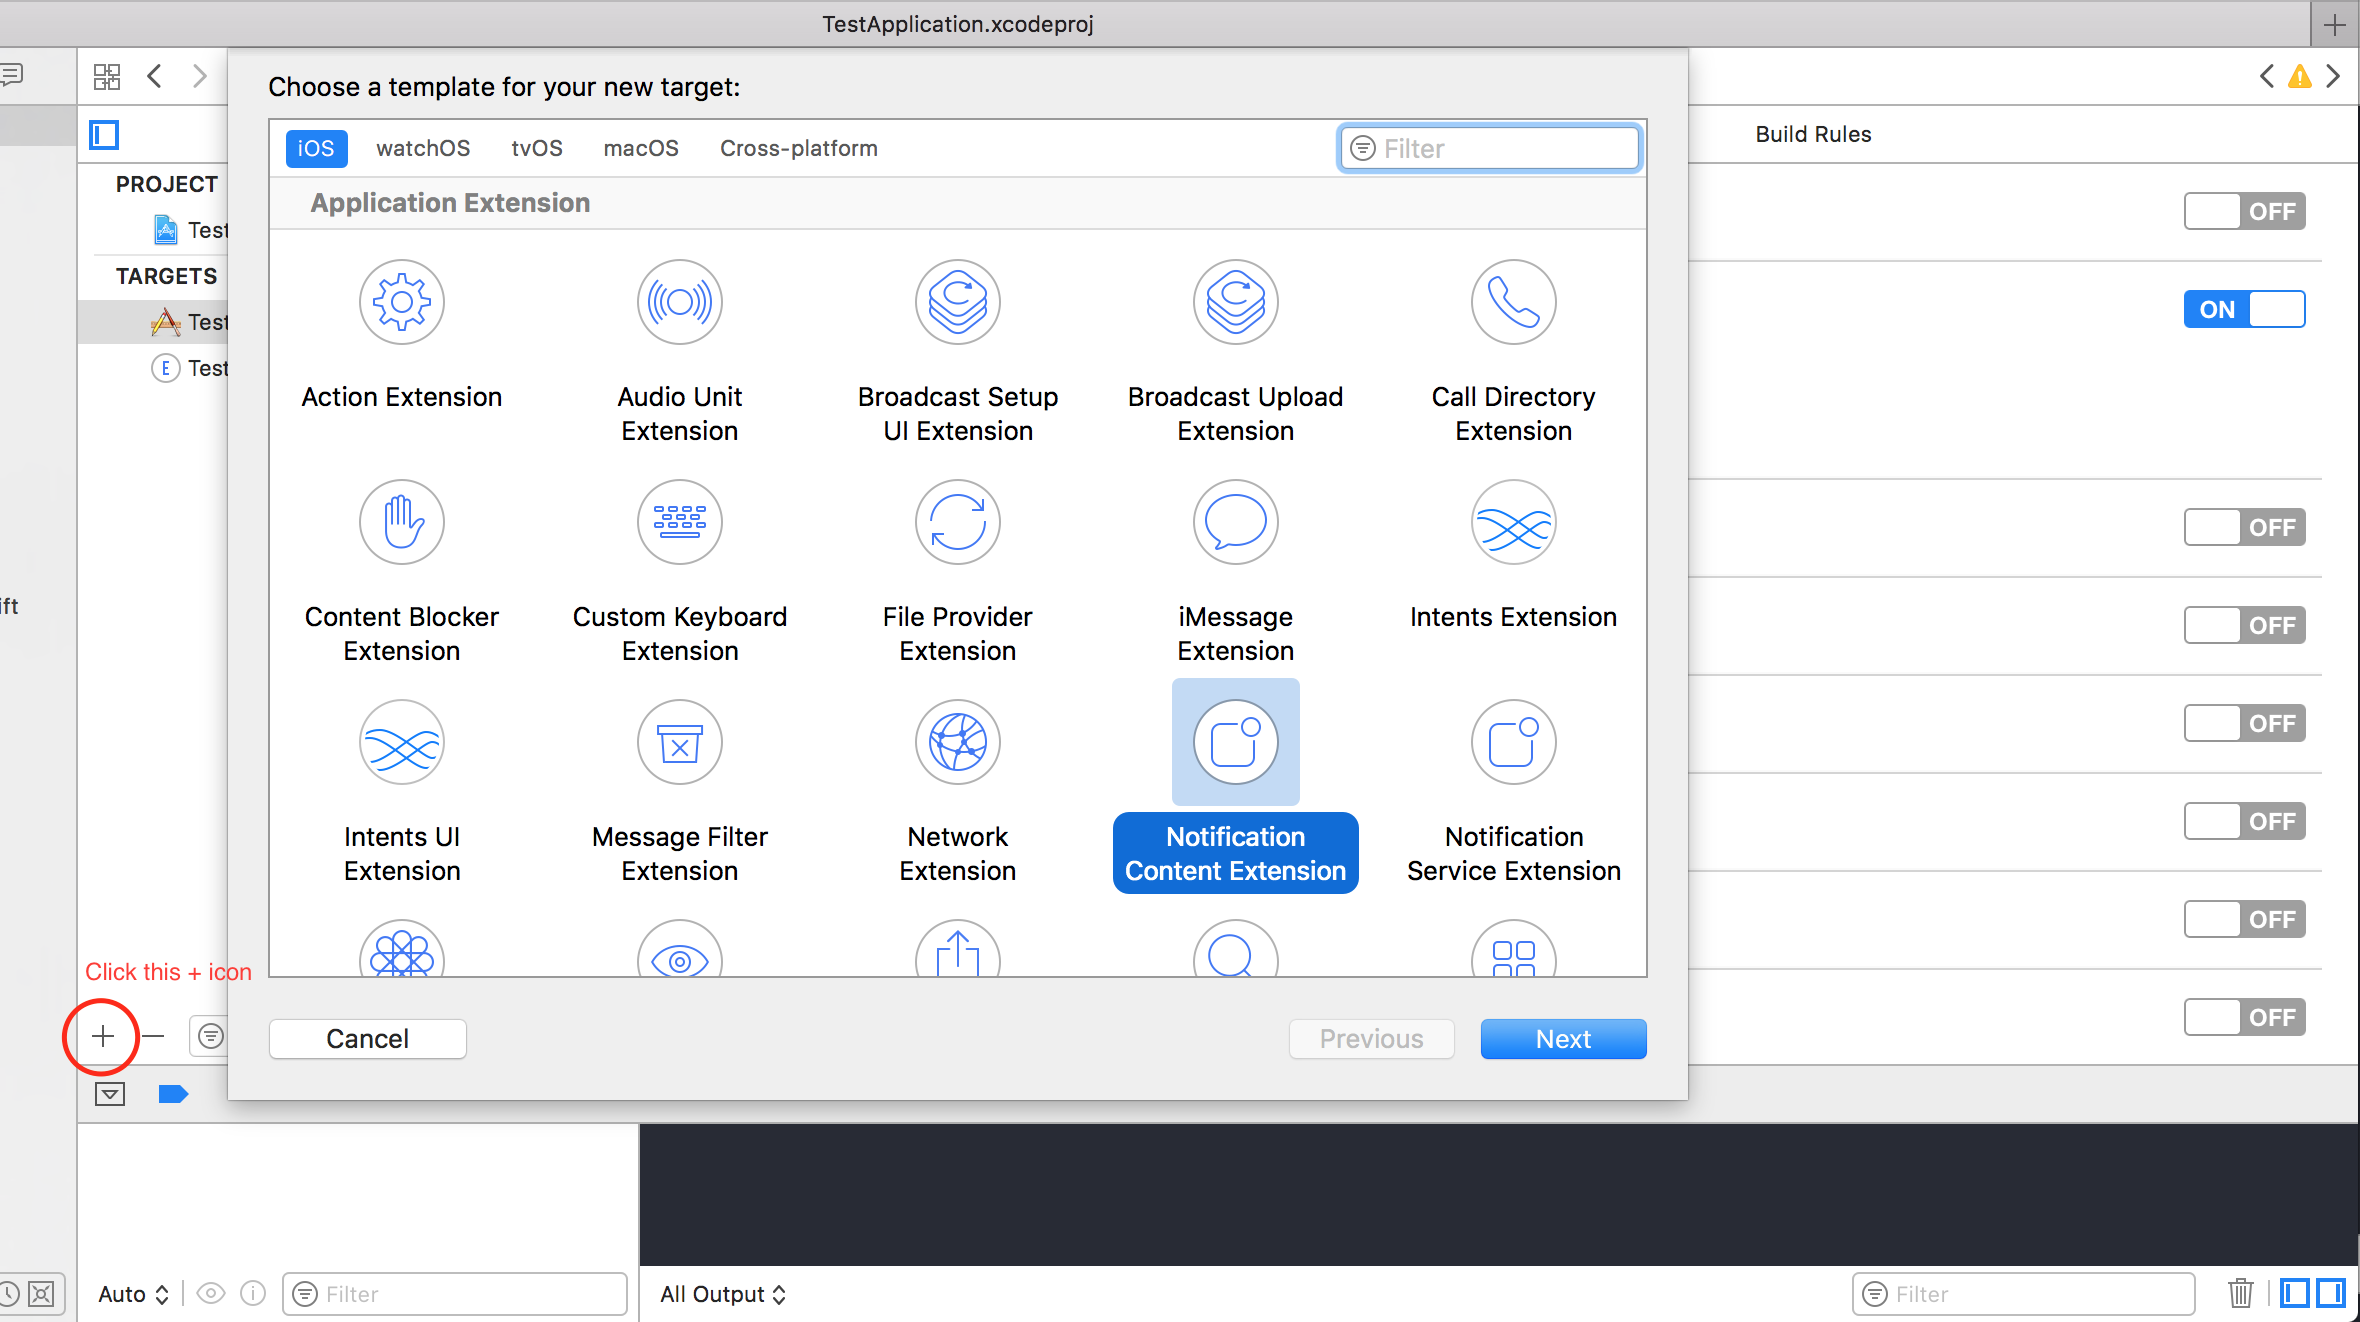
Step 2: Creating an UNNotificationContentExtension
Click on the + icon in the bottom which creates a target template and select Notification Content Extention -> next -> create a name for the content extension -> finish
Step 3:Configuring the info.plist file of the created extension
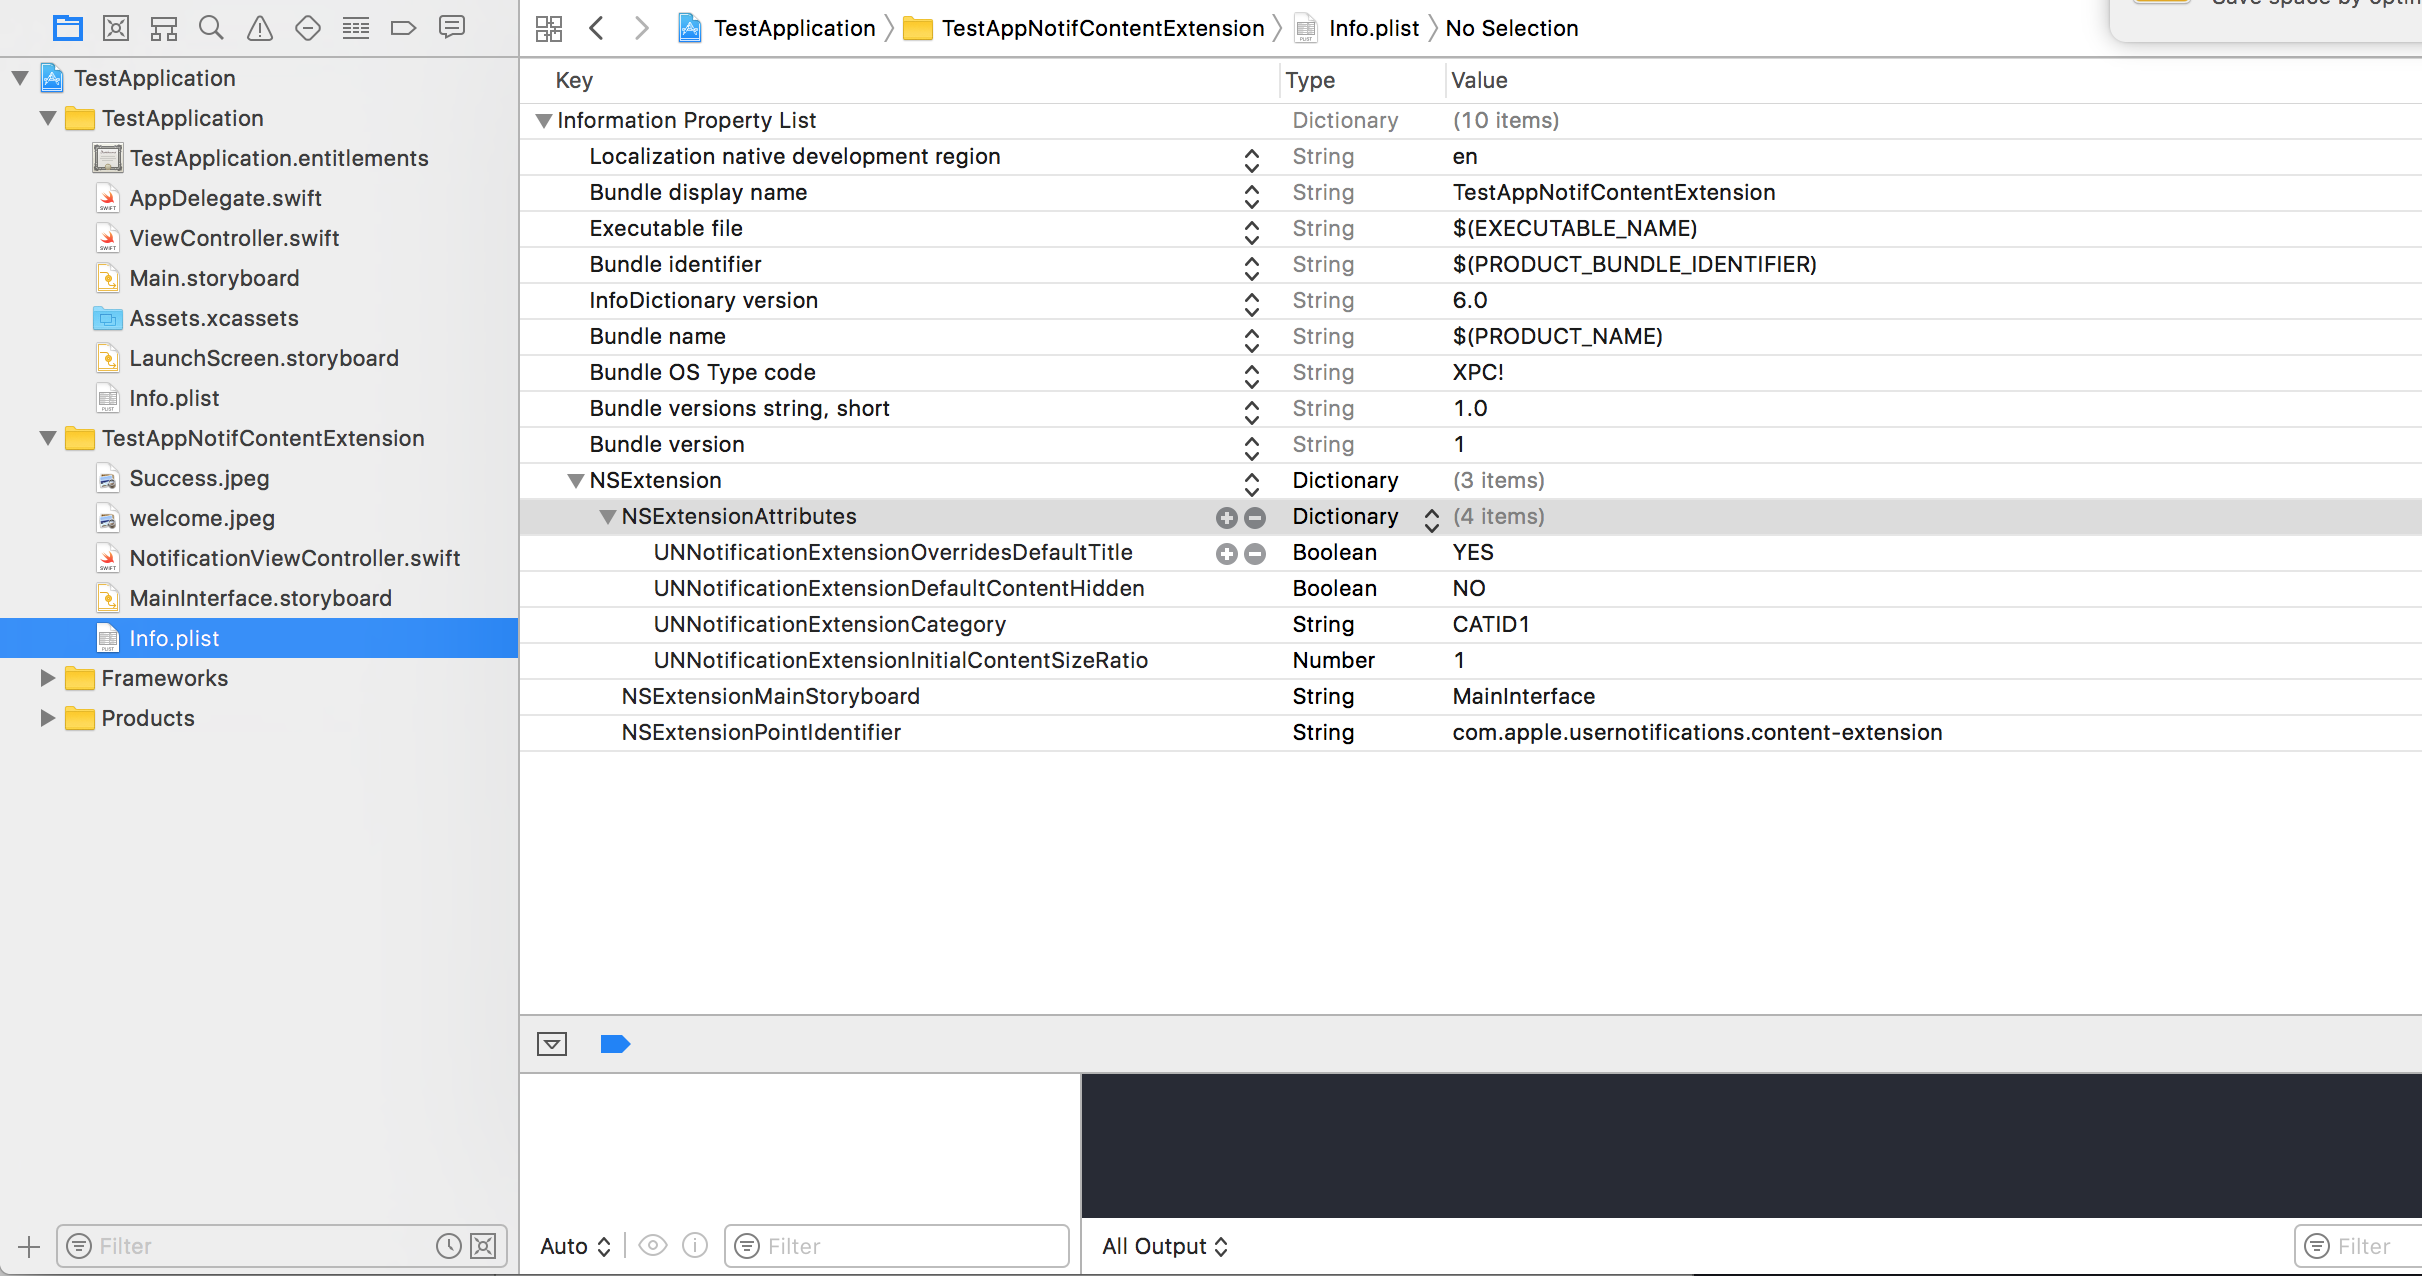
The dictionary in NSExtension signifies how the notification content is displayed, these are performed on long pressing the received notification
- UNNotificationExtensionOverridesDefaultTitle: We can give custom title for our notification by default it displays the name of the application
self.title = myTitle - UNNotificationDefaultContentHidden: This boolean determines whether the default body of the notification is to be hidden or not
- UNNotificationCategory: Category is created in
UNUserNotificationCenterin your application. Here it can be either a string or an array of strings, so each category can gave different types of data from which we can create different UI’s. The payload we send must contain the category name in order to display this particular extension - UNNotificationExtensionInitialContentSizeRatio: The size of the initial content ie when displaying the ContentExtension for the first time the initial size with respect to width of the device. here 1 denotes the height will be equal to the width
Step 4: Creating UNNotificationAction and UNNotificationCategory in our application
In your app’s AppDelegate.swift didFinishLaunchingWithOptions function add
let userNotificationAction:UNNotificationAction = UNNotificationAction.init(identifier: "ID1", title: "வணக்கம்", options: .destructive)
  let userNotificationAction2:UNNotificationAction = UNNotificationAction.init(identifier: "ID2", title: "Success", options: .destructive)

  let notifCategory:UNNotificationCategory = UNNotificationCategory.init(identifier: "CATID1", actions: [userNotificationAction,userNotificationAction2], intentIdentifiers: ["ID1","ID2"] , options:.customDismissAction)

  UNUserNotificationCenter.current().delegate = self
  UNUserNotificationCenter.current().setNotificationCategories([notifCategory])
  UIApplication.shared.registerForRemoteNotifications()
We created two UNNotificationAction with identifiers ID1 and ID2 and added those actions to a UNNotificationCategory with identifier CATID1 (the categoryID in ContentExtension’s info.plist file are same, what we created here should be used in payload and the plist file). We set the category to our application’s UNUserNotificationCenter and in next line we are registering for the notification which calls the didRegisterForRemoteNotificationsWithDeviceToken function where we get the device token
Note: dont forget to import UserNotifications in your AppDelegate.swift and add UNUserNotificationCenterDelegate
Step 5: Sample payload for the NotificationContent
'aps': {
   'badge': 0,
   'alert': {
       'title': "Rich Notification",
       'body': "Body of RICH NOTIFICATION",
       },
   'sound' : "default",
   'category': "CATID1",
   'mutable-content':"1",
   },
'attachment': "2"
Step 6: Configuring the ContentExtension
The corresponding actions for the category is automatically displayed while the notification action is performed. Lets us see the code how its being performed
import UIKit
import UserNotifications
import UserNotificationsUI

class NotificationViewController: UIViewController, UNNotificationContentExtension {

@IBOutlet var imageView: UIImageView?
override func viewDidLoad() {
    super.viewDidLoad()
}

func didReceive(_ notification: UNNotification) {
     self.title = "Koushik"
    imageView?.backgroundColor = UIColor.clear
    imageView?.image = #imageLiteral(resourceName: "welcome.jpeg")
}

func didReceive(_ response: UNNotificationResponse, completionHandler completion: @escaping (UNNotificationContentExtensionResponseOption) -> Void) {

    self.title = "Koushik"
    imageView?.image = UIImage.init(named: "Success.jpeg")

    if(response.actionIdentifier == "ID1")
    {
       imageView?.image = UIImage.init(named: "Success.jpeg")
    }
    else
    {
        imageView?.image = UIImage.init(named: "welcome.jpeg")
    }

    }
}
Step 7: Result
After receiving and long press/Clicking View notification, the notification looks like this
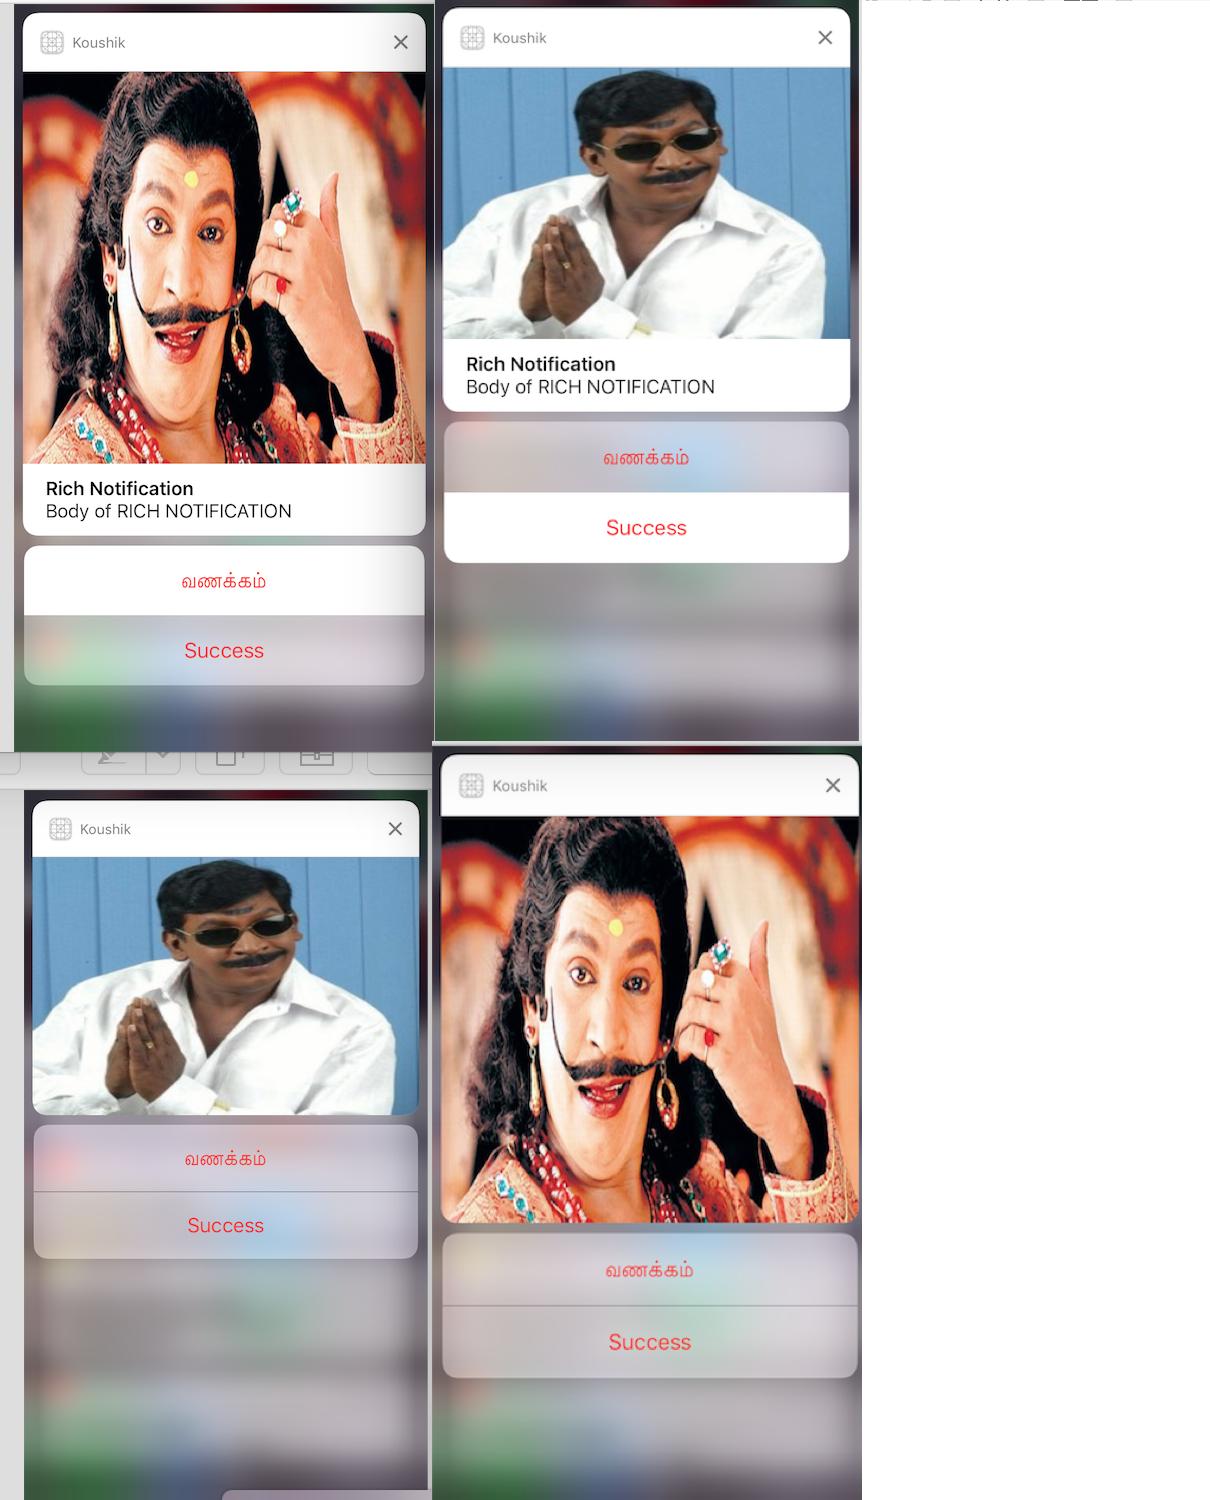
The title is “Koushik” since we gave self.title = "Koushik" and UNNotificationExtensionOverrideDefaultTitle as YES. In step 3 we gave UNNotificationExtensionDefaultContentHidden as NO if its YES then the notification will look like images 3 and 4.