Scrolling content with Auto Layout enabled
suggest changeThis project is a self-contained example done completely in the Interface Builder. You should be able to work through it in 10 minutes or less. Then you can apply the concepts you learned to your own project.

Here I just use UIViews but they can represent whatever view you like (ie, button, label, etc). I also chose horizontal scrolling because the storyboard screenshots are more compact for this format. The principles are the same for vertical scrolling, though.
Key concepts
- The
UIScrollViewshould only use one subview. This is a ‘UIView’ that serves as the content view to hold everything you wish to scroll. - Make the content view and the scroll view’s parent have equal heights for horizontal scrolling. (Equal widths for vertical scrolling)
- Make sure that all of the scrollable content has a set width and is pinned on all sides.
Start a new project
It can be just a single view application.
Storyboard
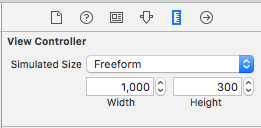
In this example, we will make a horizontal scroll view. Select the View Controller and then choose Freeform in the Size Inspector. Make the width 1,000 and the height 300. This just gives us the room on the storyboard to add content that will scroll.
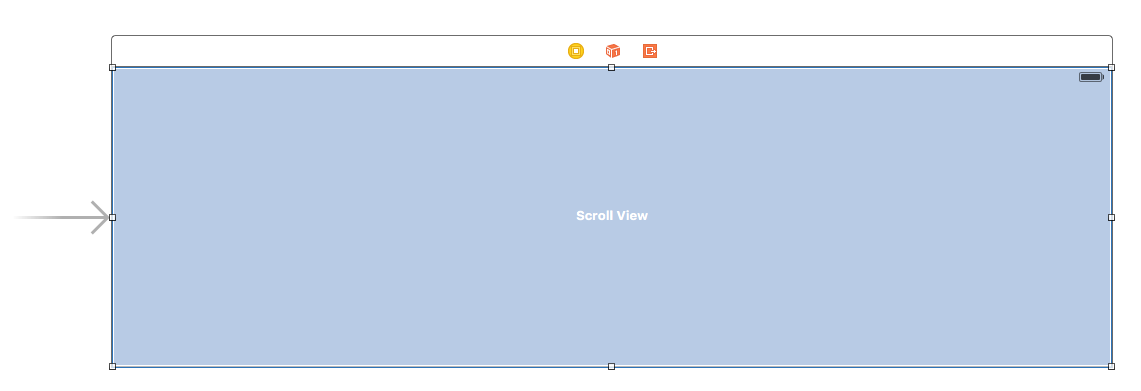
Add a Scroll View
Add a UIScrollView and pin all four sides to the root view of the view controller.
Add a Content View
Add a UIView as a subview to the scroll view. This is key. Don’t try to add lots of subviews to the scroll view. Just add a single UIView. This will be your content view for the other views you want to scroll. Pin the content view to the scroll view on all four sides.

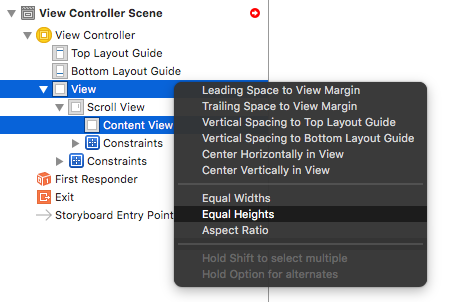
Equal Heights
Now in the Document Outline, Command click both the content view and the scroll view’s parent view in order to select them both. Then set the heights to be equal (Control</kbd drag from the Content View to the Scroll View>). This is also key. Because we are scrolling horizontally, the scroll view’s content view won’t know how high it should be unless we set it in this way.
Note:
- If we were making the content scroll vertically, then we would set the content view’s width to be equal to the scroll view’s parent’s width.
Add content
Add three UIViews and give them all constraints. I used 8 point margins for everything.
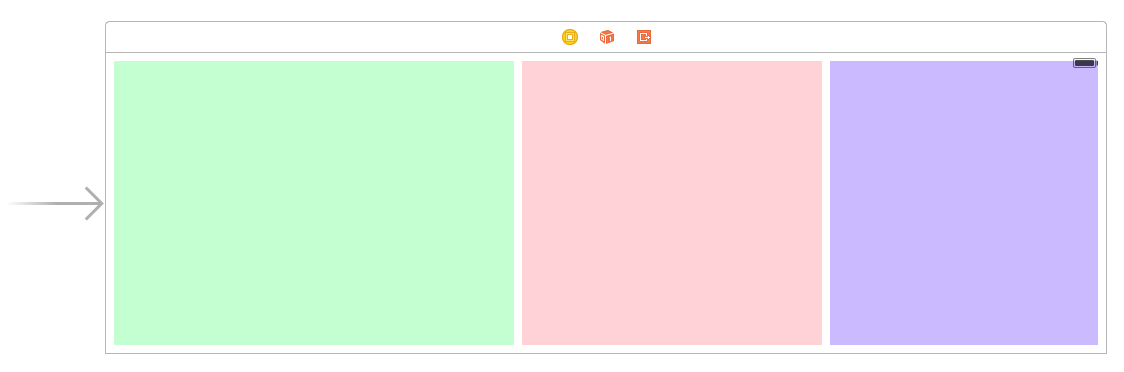
Constraints:
- Green view: pin the top, left, and bottom edges. Make the width 400.
- Red view: pin the top, left, and bottom edges. Make the width 300.
- Purple view: pin all four edges. Make the width whatever the remaining space is (268 in this case).
Setting the width constraints is also key so that the scroll view knows how wide its content view will be.
Finished
That’s all. You can run your project now. It should behave like the scrolling image at the top of this answer.
Further Study
- iOS: How To Make AutoLayout Work On A ScrollView
- How to configure a UIScrollView with Auto Layout in Interface Builder
- YouTube video tutorial: UIScrollView - How to keep your views on screen